App setup
Strategy Hub turns your strategic plan into a living model of Strategic Items—Objectives, Key Results, KPIs, or whatever your framework calls them—owned by people, assigned to Teams, and tracked through configurable Statuses. This page walks an admin from install through the setup wizard to the first useful view. Every choice the wizard asks for has a sensible default and can be changed later in Settings, so you can move quickly and refine as you go.
Before you install#
Strategy Hub runs inside Jira as a Forge app, so there is nothing separate to host and your data stays on Atlassian infrastructure. Before you start, line up:
- A Jira Cloud site you can install apps on.
- Jira admin permission — the setup wizard is admin-only, and you’ll designate who else administers Strategy Hub during it.
- A rough idea of how your organization plans. The wizard can recommend a framework for you, but it helps to know whether you run OKRs, a single-page plan, or something more specialized. See Strategy frameworks for the full set.
Install from the Atlassian Marketplace#
Install Strategy Hub the same way as any other Jira app:
- In Jira, open Apps in the top navigation and choose Explore more apps.
- Search for “Strategy Hub” and open its listing.
- Select Install and accept the requested scopes.
After it installs, Strategy Hub appears under the Jira Apps menu as a global page. Open it once and the setup wizard starts automatically for admins. Anyone who opens Strategy Hub before an admin finishes setup sees a short holding screen rather than an empty workspace.
Run the setup wizard#
The setup wizard is four steps—framework, data, permissions, and Jira—followed by a short screen that builds your workspace. A step indicator across the top tracks where you are, and you can move back to revisit any earlier choice. Nothing is written until the final step, and every setting the wizard collects is editable afterward in Settings.
Choose a framework#
A framework is a preset for your Item hierarchy — the levels you can create (its Types), how they nest, the Statuses they move through, and how progress rolls up. Rather than open on a wall of options, the step starts with a short conversation: answer three questions about your organization’s size and planning style, and Strategy Hub recommends the preset that fits best.
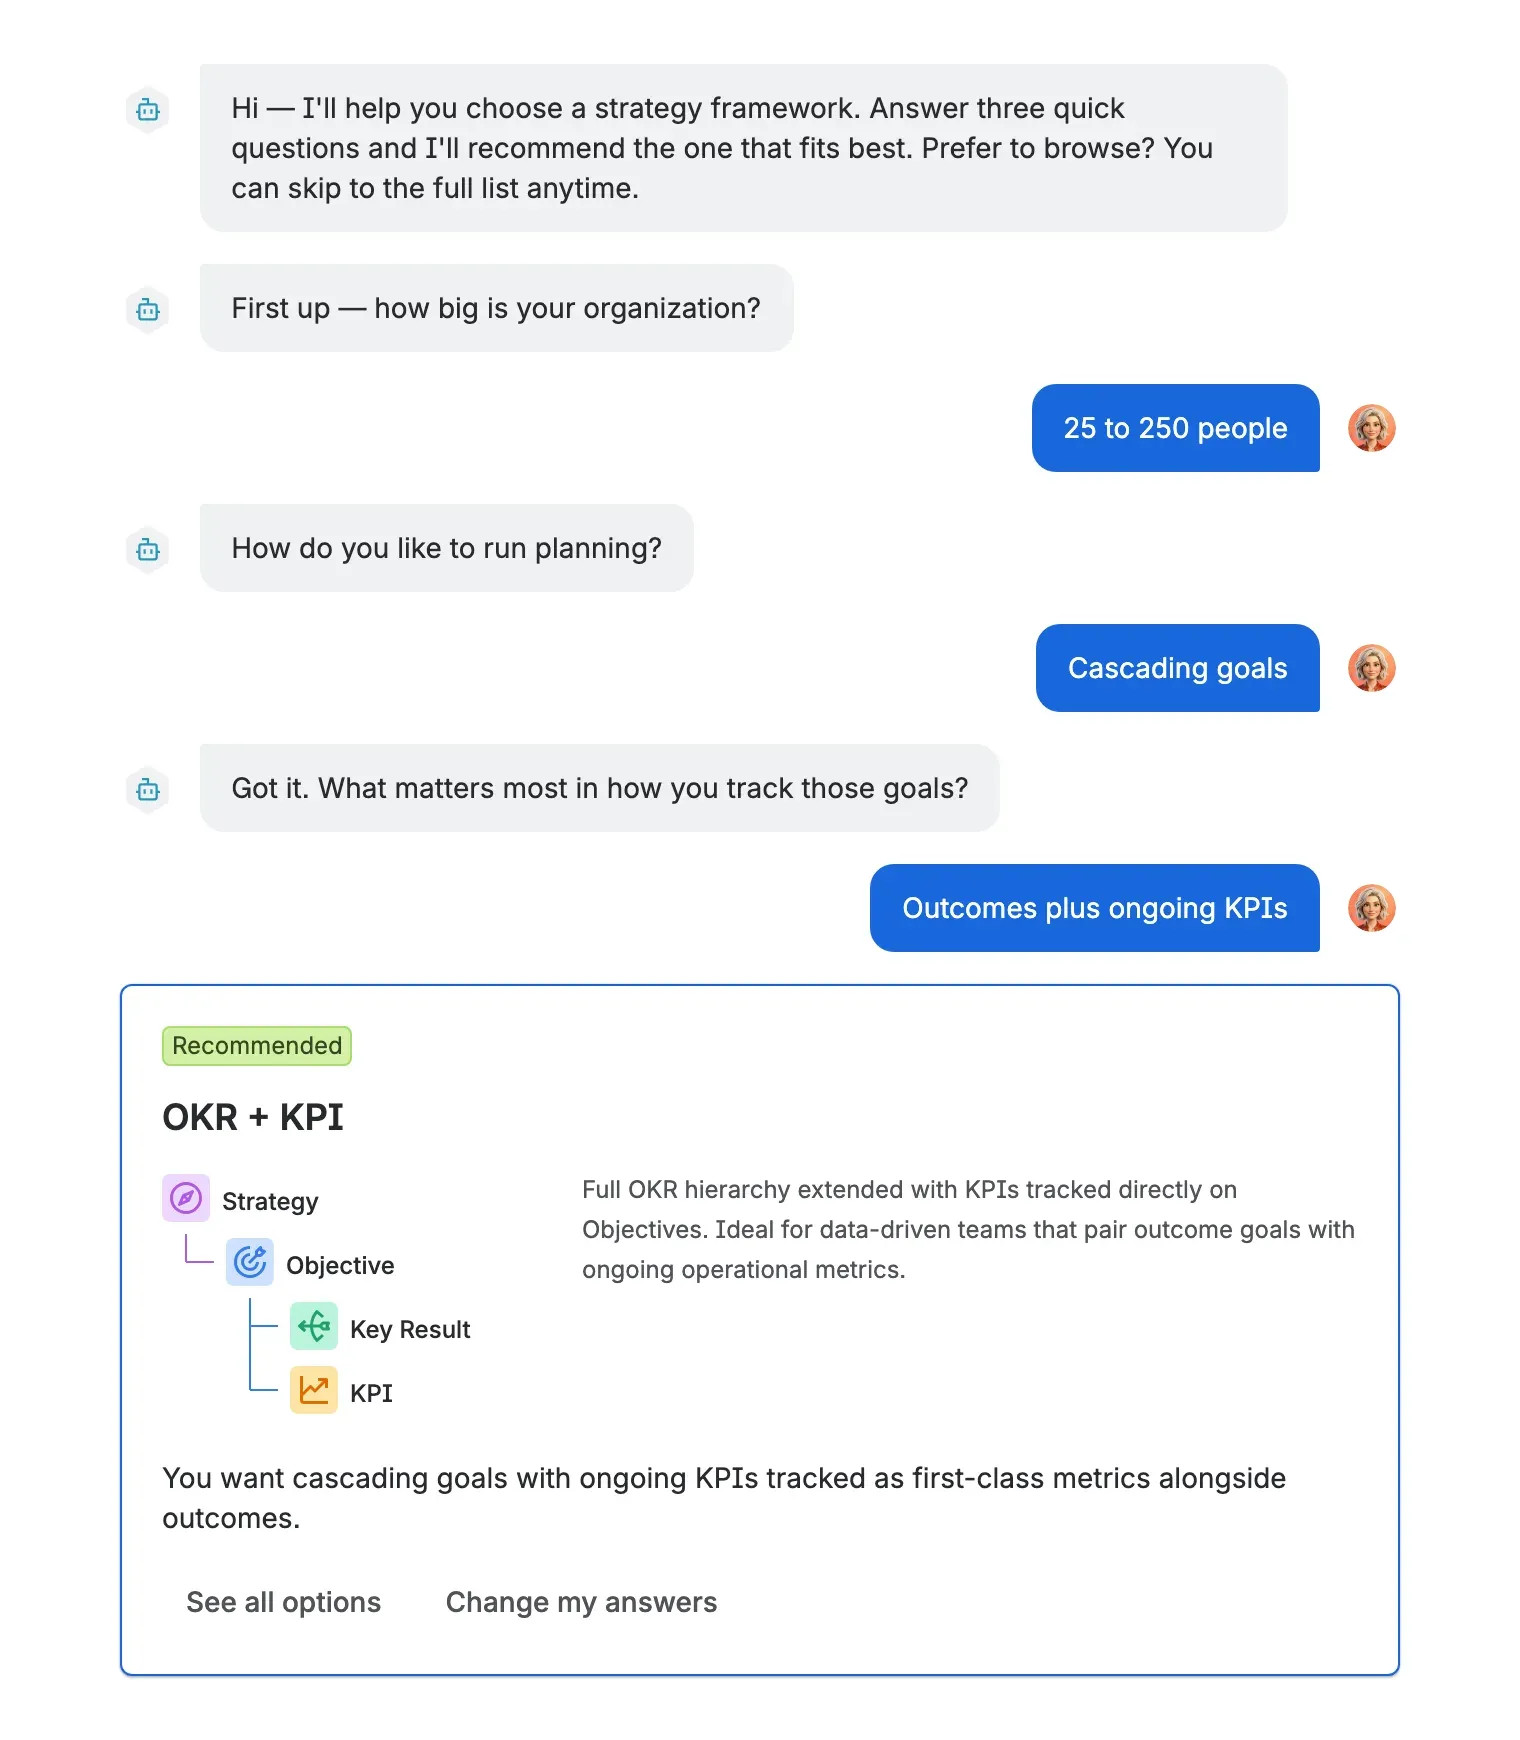
The recommendation is a suggestion, not a commitment. Accept it to move on, or choose See all options to compare the full grid of eight presets with your recommendation pre-selected. Prefer to skip the questions? Choose Skip — I know what I want on the first question to jump straight to the grid and pick one yourself.
Picking a framework is a single click, and it is never a lock-in — you can change the framework and reshape its Types and Status Sets at any time in Settings. For what each preset models and how to tailor or build your own, see Strategy frameworks.
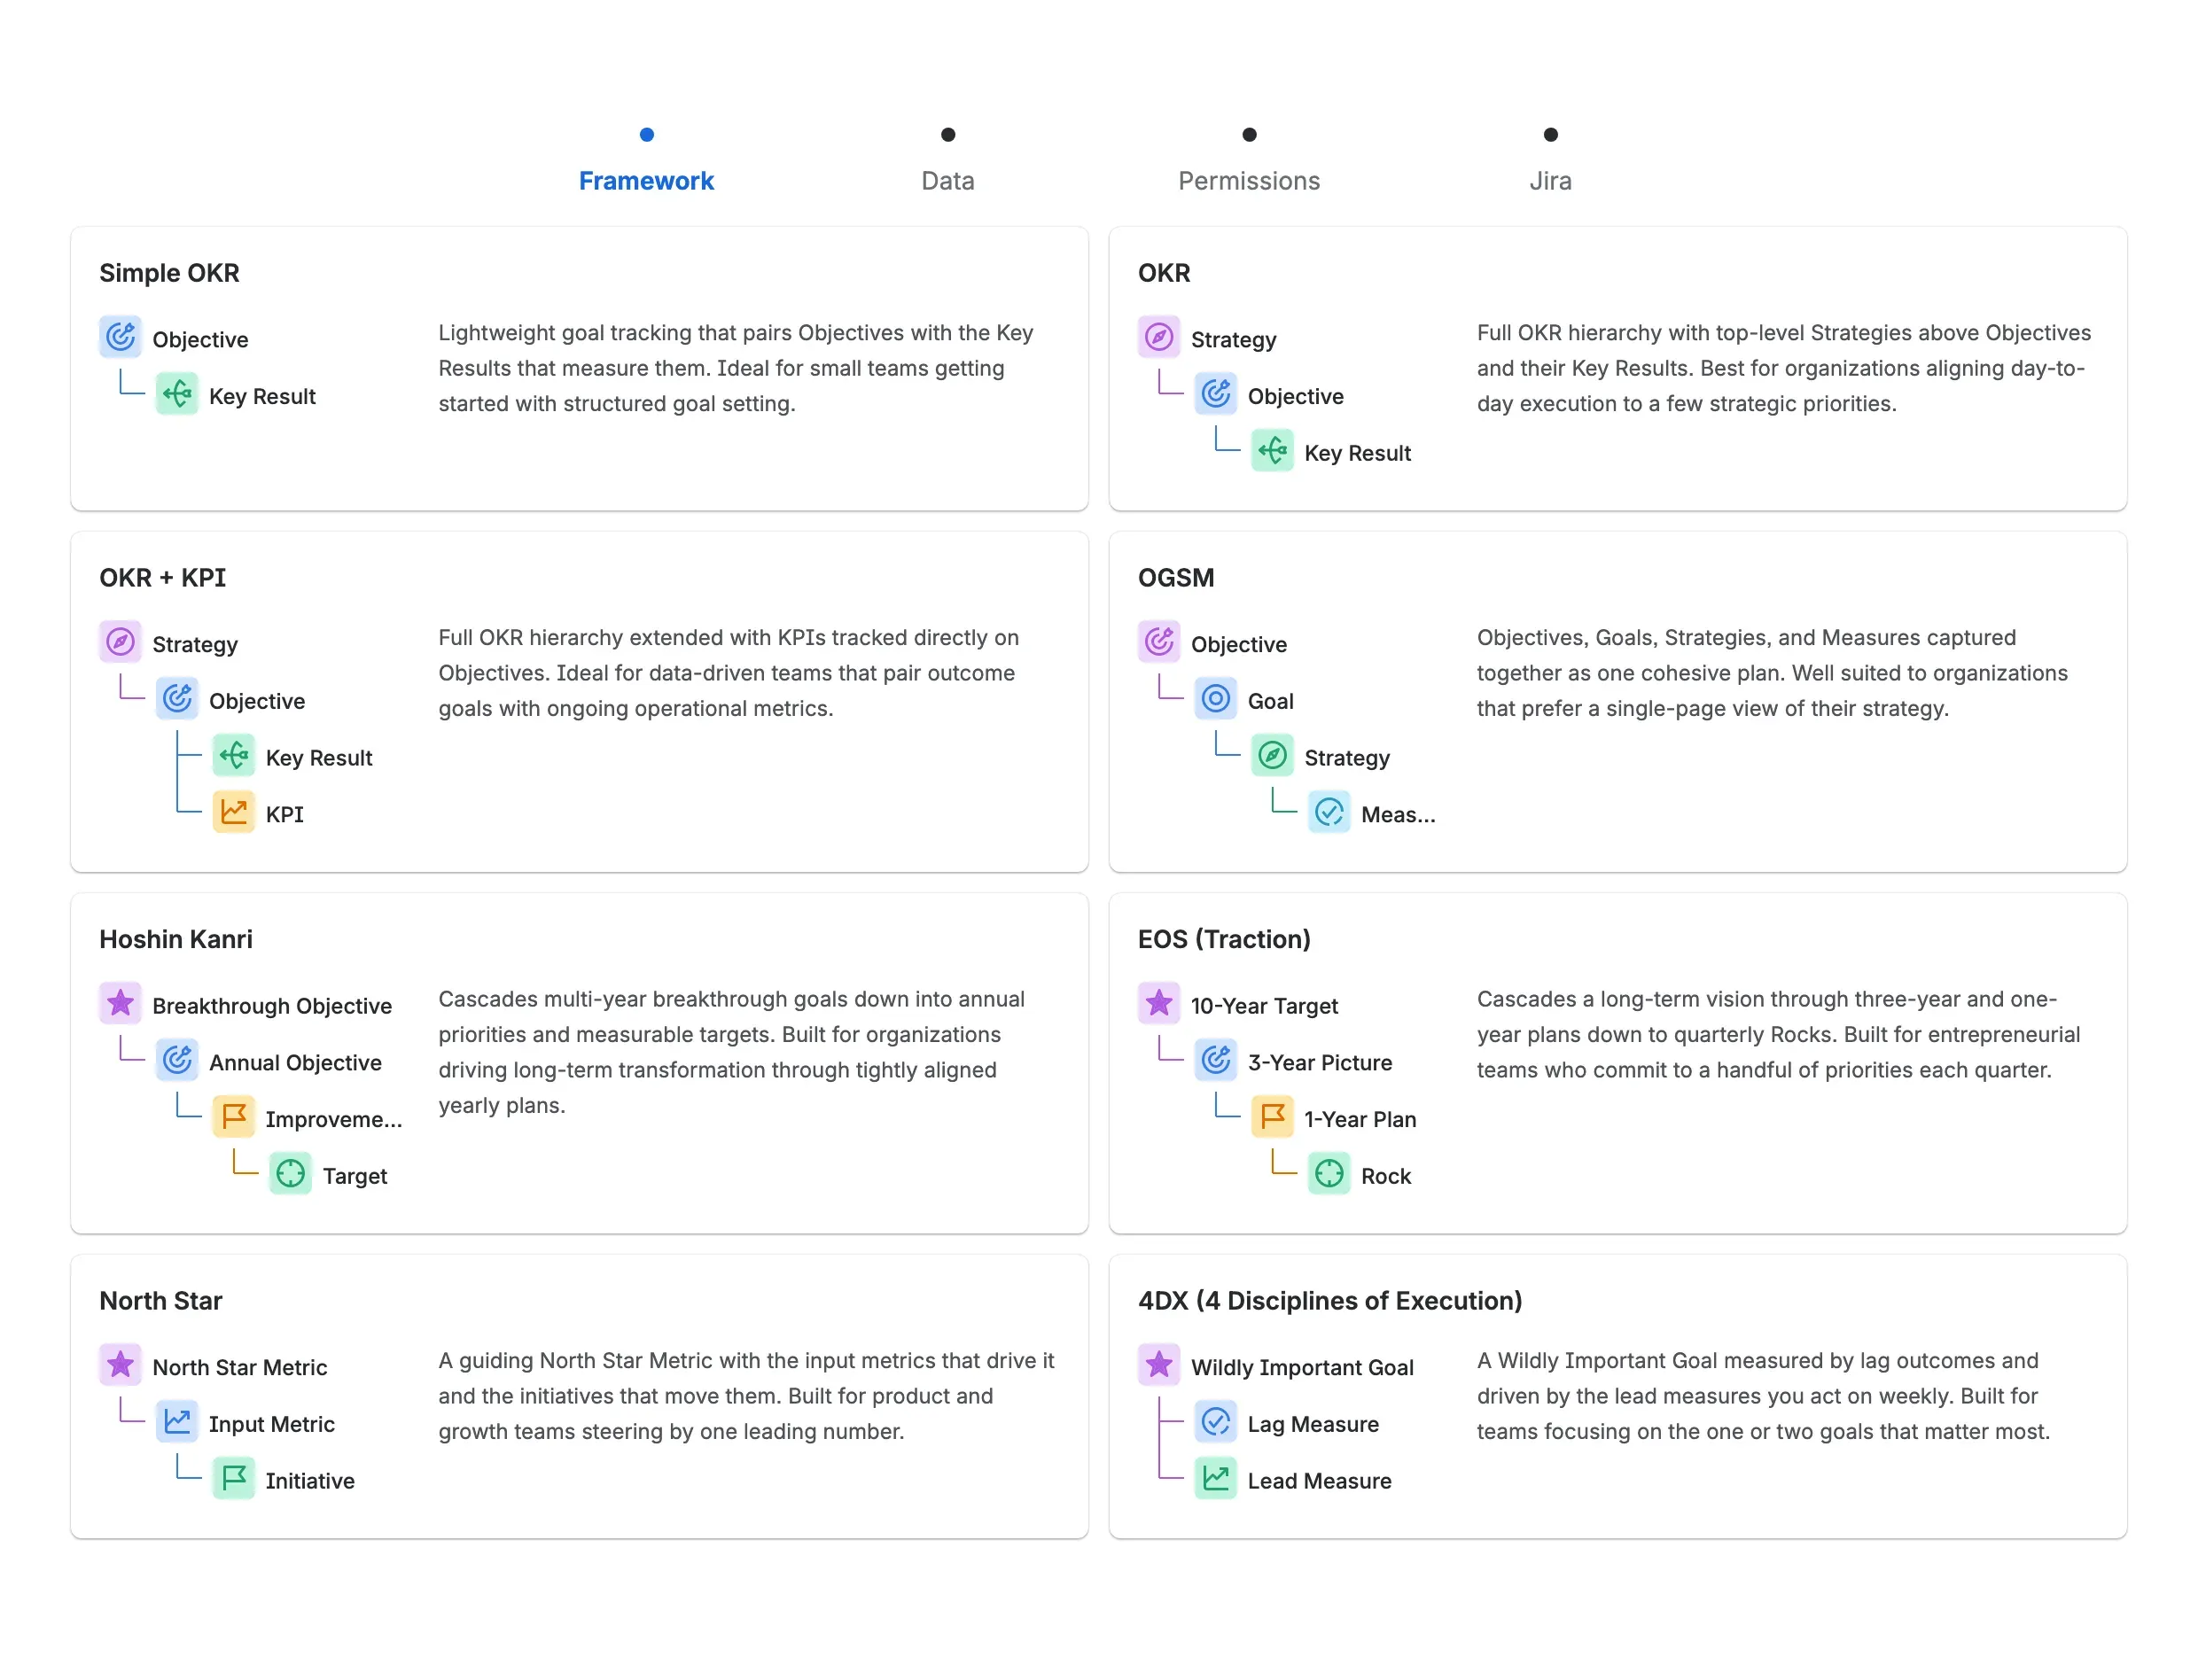
Either path lands on the same grid of all eight presets, each card showing its Type hierarchy at a glance:
Seed your data#
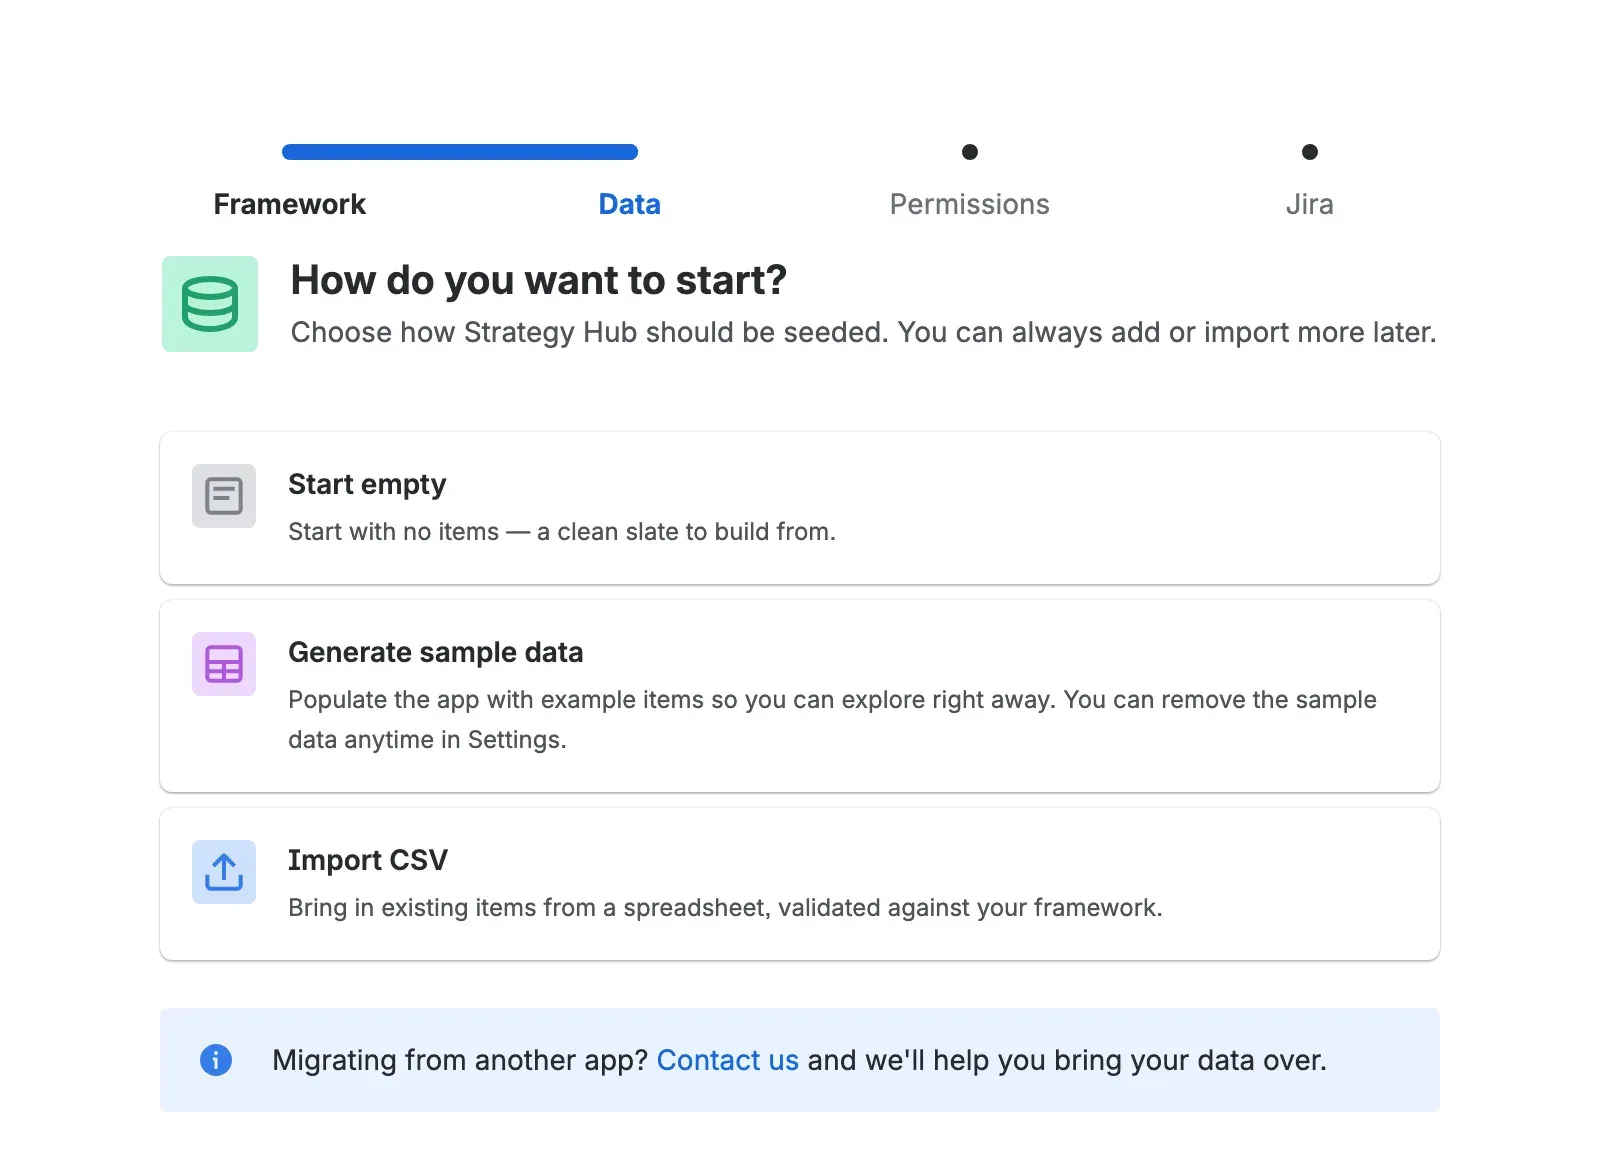
Next, choose how your new workspace starts:
- Start empty — a clean slate with no Items, ready for you to build.
- Generate sample data — example Items that match your framework, so you can explore the views right away. You can remove the sample data later in Settings.
- Import CSV — bring in Items from a spreadsheet, validated against your framework’s Types. See Import from CSV for the column format.
Set permissions#
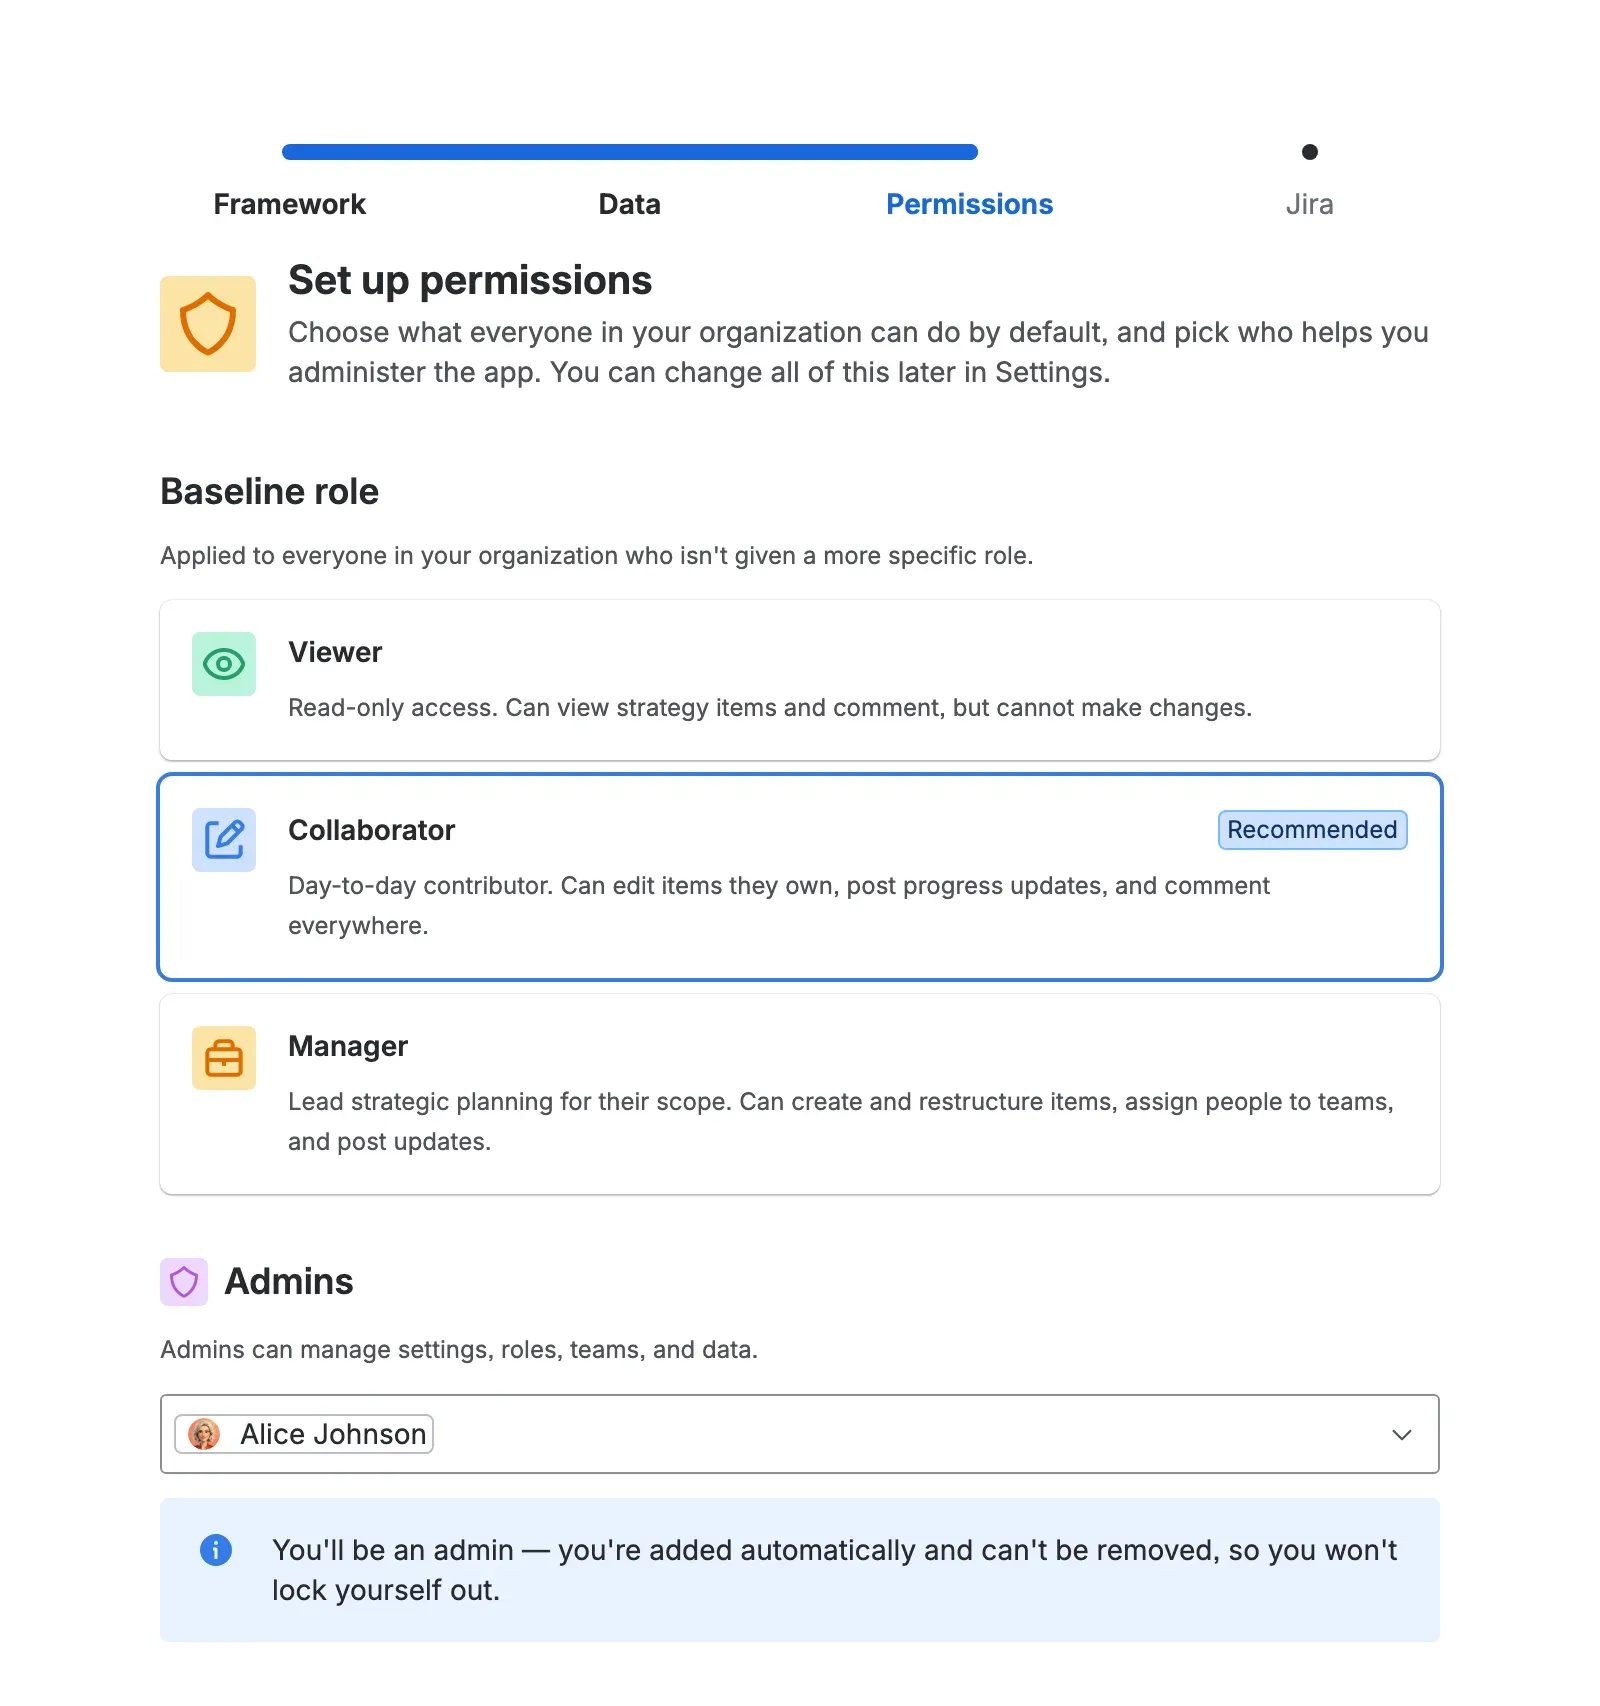
This step decides what everyone in your organization can do by default and who helps you administer Strategy Hub.
- Baseline role — the access level every member starts with: Viewer, Collaborator, or Manager. Collaborator is the recommended default. This sets the floor; you can grant more on individual Items later.
- Admins — the people who can manage settings, roles, Teams, and data. You are always an Admin and can add co-admins here.
The role model behind these choices is covered in Access and permissions.
Connect Jira#
The last step wires Strategy Hub into your Jira site. Each option is a sensible default you can change later in Settings:
- Sync Jira teams — keep Strategy Hub’s Team list in step with the Teams on your Jira site.
- Custom JQL function — let Jira filters reference Strategy Hub Items with the
linkedToStrategyItem()JQL function. - Rovo integration — let people open Strategy Hub’s Rovo agent from in-app buttons and Rovo Chat. If Rovo isn’t available on your site, this stays off.
- Issue panel — show the Strategy Hub panel on the Jira issue view, so linked work is visible from the issue.
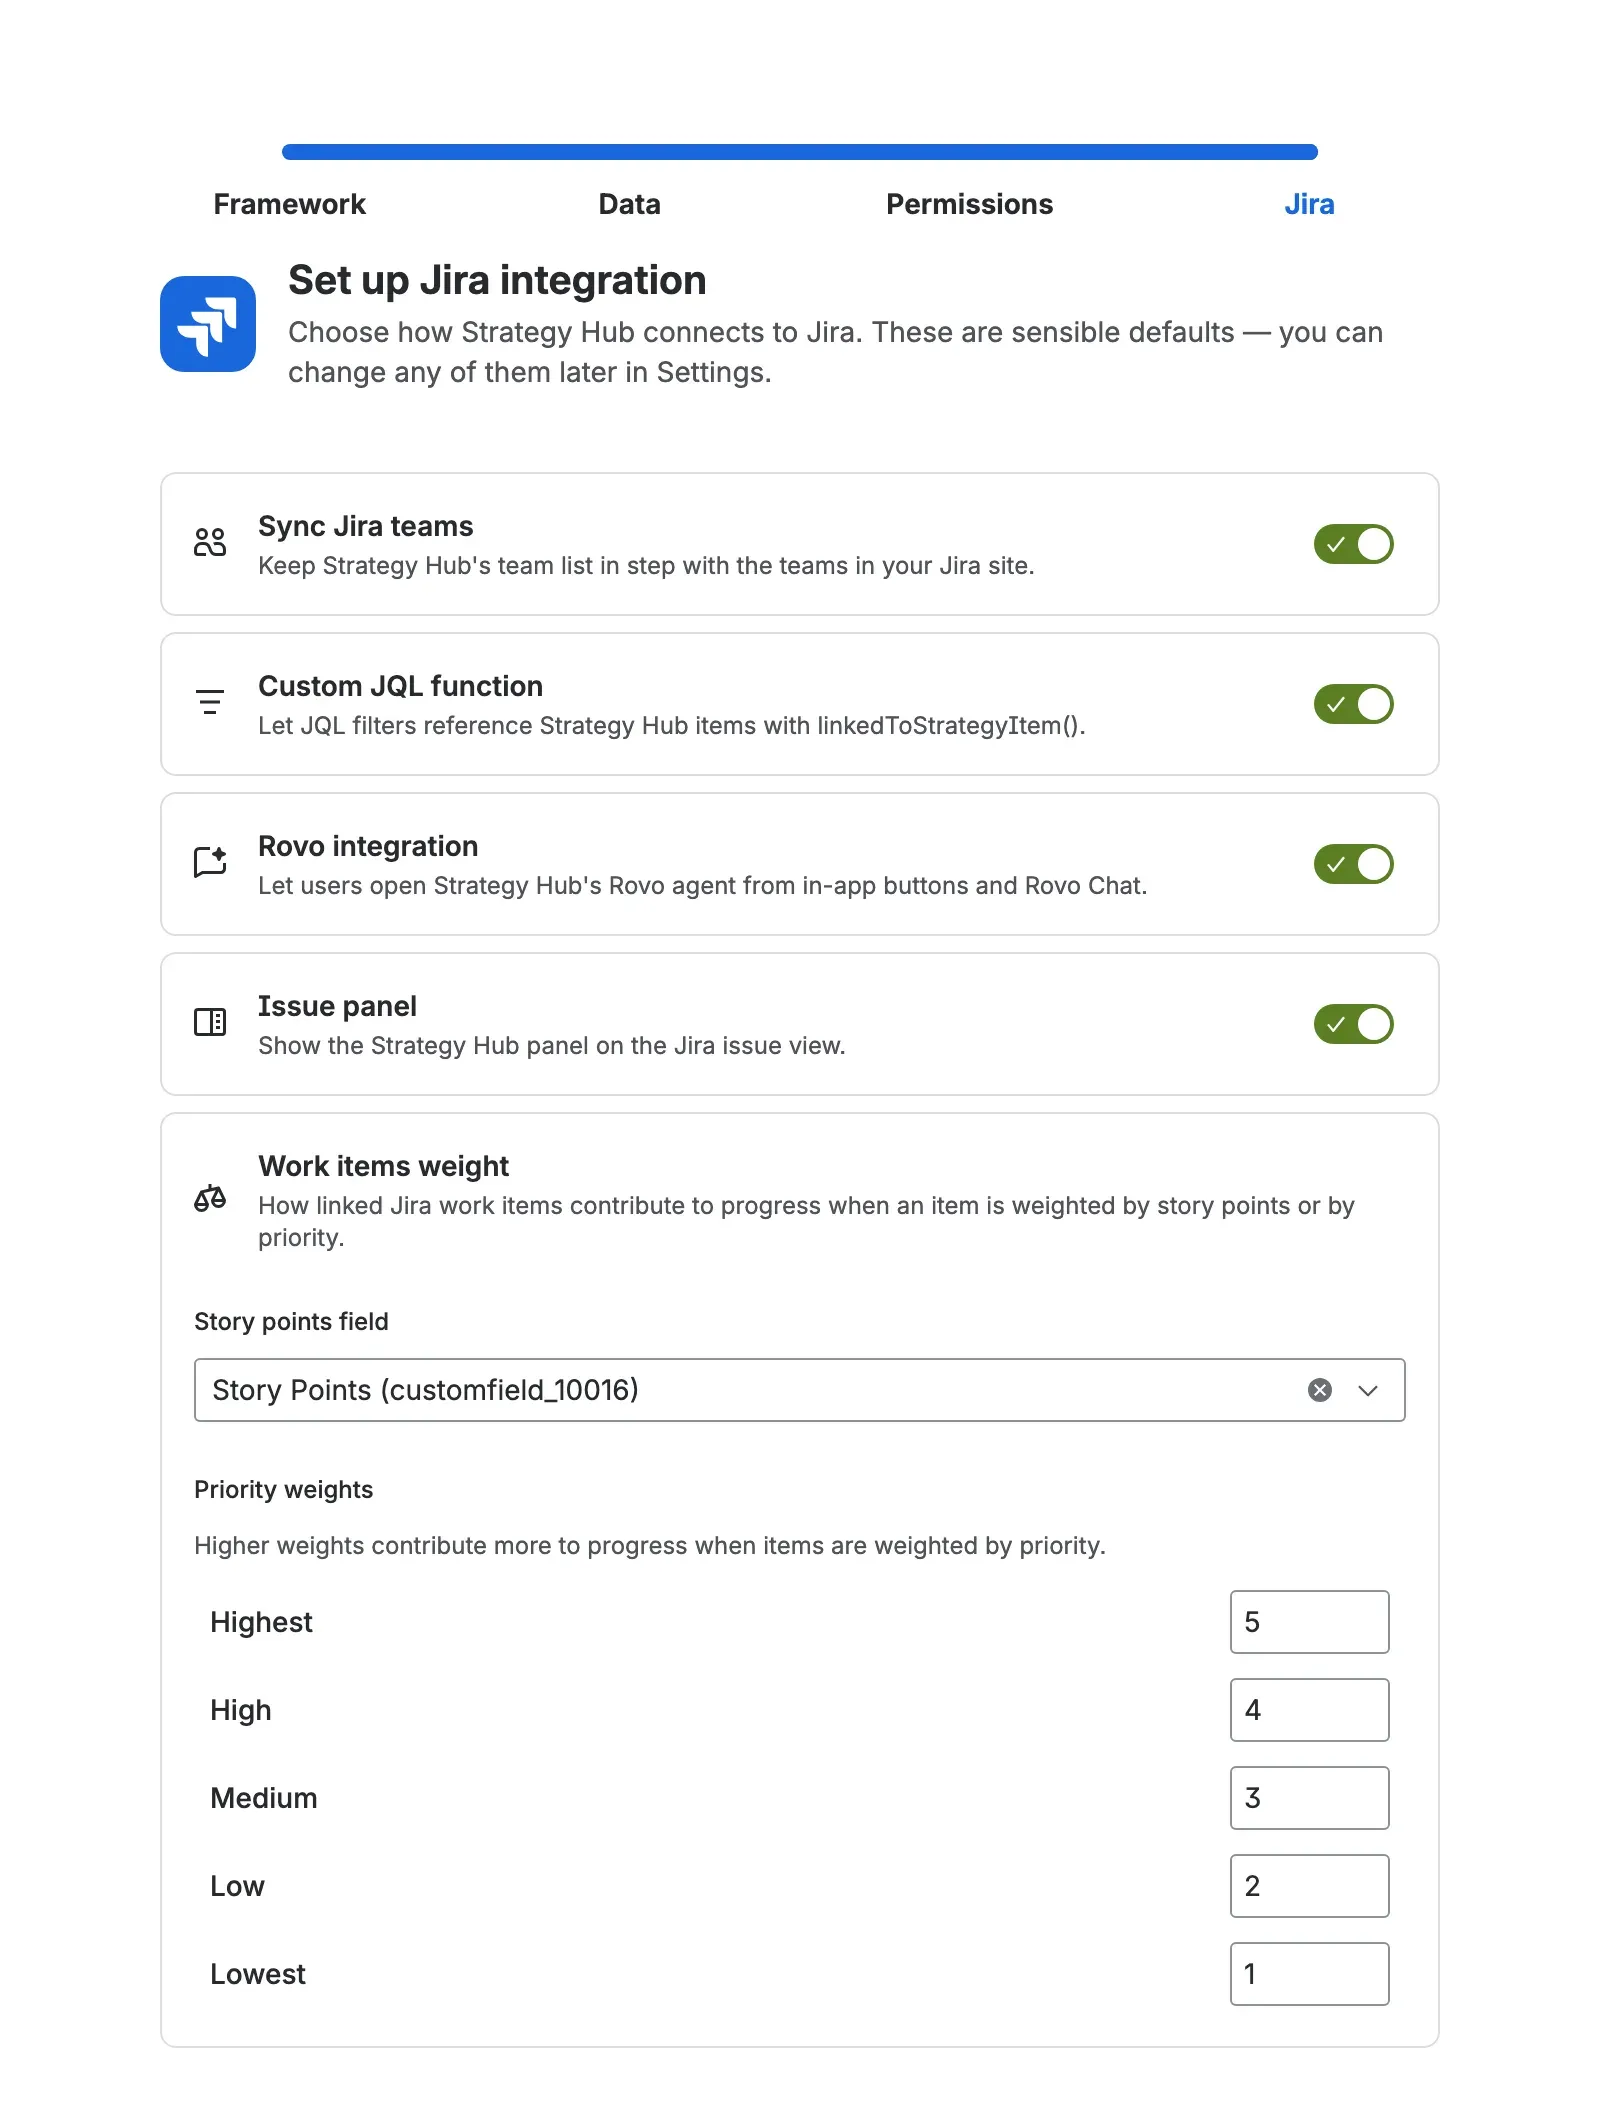
When linked work rolls up into an Item’s value, this step is also where you decide whether that value is weighted evenly, by story points, or by priority. Jira integration covers linked work in depth.
Finish setup#
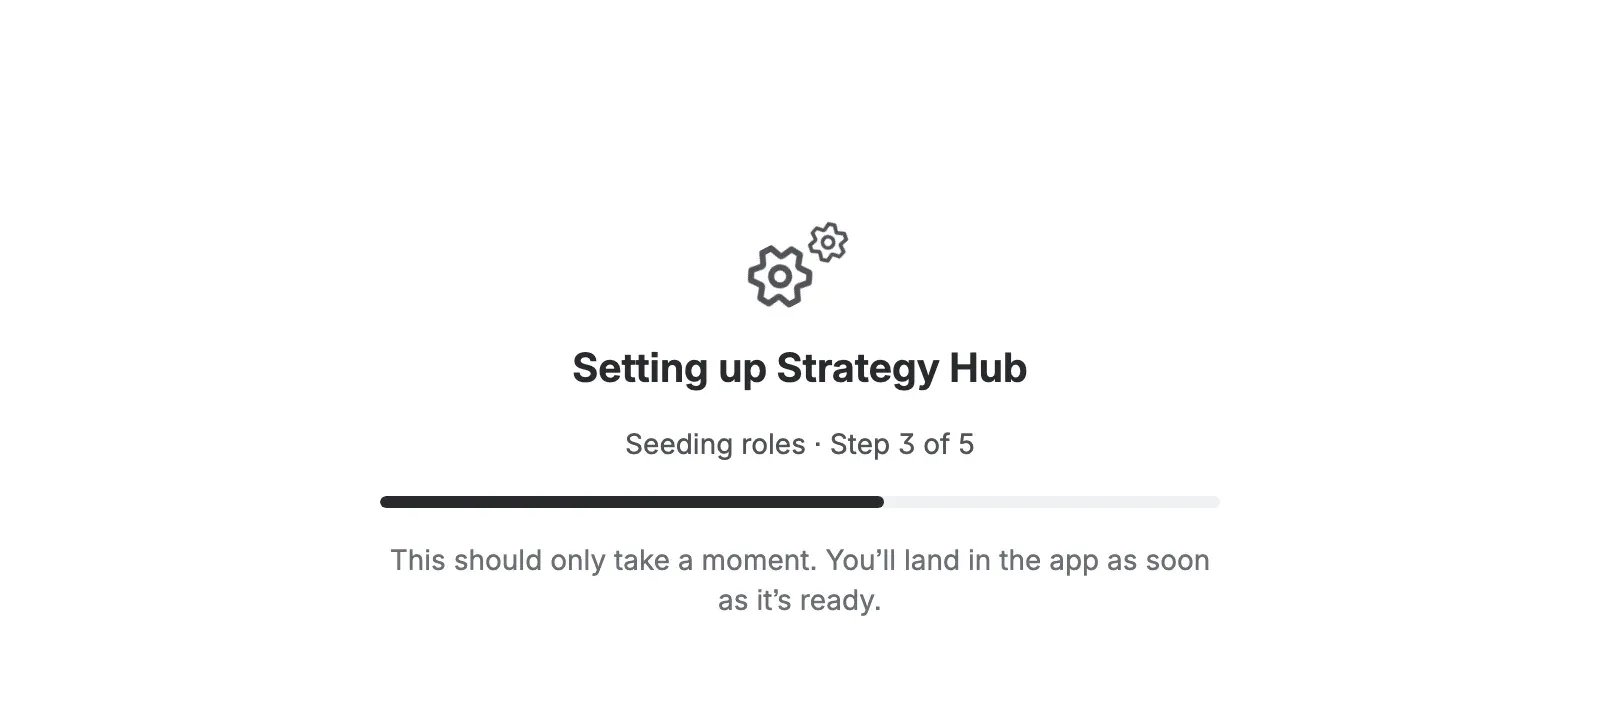
The final step applies your choices: it creates the framework’s Types and Status Sets, seeds roles, syncs Teams, and—if you asked for it—generates the sample data or imports your CSV. A progress screen shows each phase as it runs. When it finishes, Strategy Hub opens on the Dashboard.
Create your first Item#
With setup done, create the first real Item from any view with Create new. The create dialog asks for the essentials:
- Type — which level in the hierarchy this Item sits at (an Objective, a Key Result, and so on).
- Name, Owner, and, for anything below the top level, a Parent.
- A start and target value, plus start and end dates.
Strategy Hub mints a key from the Type’s prefix—an Objective becomes O-1, a Key Result KR-1—so every Item has a stable handle. You can save an Item as a draft to stage it during a planning session and publish it later. Strategic Items covers the full lifecycle, including how an Item’s value updates: manual, from nested items, or from linked work items.
Tour the views#
Once you have a few Items, point your team at the view that answers their question:
- Dashboard — “what should I look at right now?”
- Portfolio board — top-level cards with subtree health.
- Team board — per-Team workload and risk.
- Roadmap — Items on a timeline.
- Hierarchy map — Items by structure.
- Overview — a flat, filterable table of everything.
Next steps#
- Shape the structure to match your organization — rename Types, adjust levels, and edit Statuses under Configure types and status sets.
- Set auto-status thresholds so progress turns into Statuses without manual updates — see Statuses and progress.
- Already tracking plans in a spreadsheet? Bring them in with Import from CSV.
Related#
- Strategy frameworks — every preset the wizard offers, and how to customize or build your own.
- Configure types and status sets — reshape the hierarchy and Statuses your framework starts you with.
- Access and permissions — the role model behind the baseline role and admins you set during setup.
- Strategic Items — create, link, and track the Items that fill your workspace.